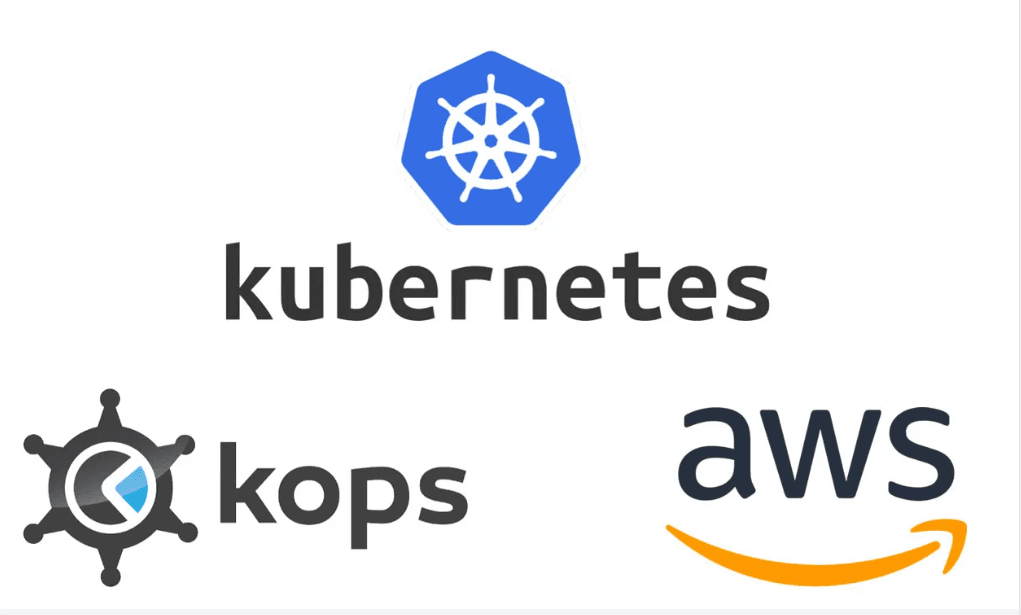
Kubernetes for Production with Kops
Automation of cluster creation via Kops in AWS. Kops|Kubernetes|AWS
Passionate about helping organizations build scalable infrastructure and DevOps solutions with cloud technologies. Experienced in designing robust systems, automating processes, and driving efficiency through innovative cloud solutions. Advocate for best practices in DevOps and cloud computing, committed to enabling teams to achieve their full potential.
Scenario
Consider a scenario where you have containerized your application components using docker or any other containerization tools. Now it's time to test it in a Kubernetes cluster and you want to try it on the cloud environment.
Tools & Services
Kops: It is used to set up production-grade Kubernetes clusters in AWS cloud and now it supports Google Cloud as well. It is one of the most famous K8S setup tools for AWS.
EKS: AWS also has its own service we'll also set up a production-grade K8S cluster using EKS which is easier than all.
Route53: It provides a hosted zone for our K8S DNS record.
Kubectl: It enables us to interact with K8S cluster
S3 Busket: It helps us to store Kops configuration.
Kops for Kubernetes
What is Kops?
Kops is a tool that helps us in creating Kubernetes clusters in several public clouds. Kops simplifies the process of deploying, managing, and scaling Kubernetes clusters on various cloud providers and on-premises infrastructure.
NOTE: Kops is not included in the K8S cluster, it is just an instance to automate the cluster creation.
Advantages of Kops
Cluster Provisioning: Streamlining cluster creation and configuration, Kops simplifies Kubernetes deployments. Accommodating various cloud service providers such as AWS, GCP, and Azure, alongside on-site infrastructures.
Cluster Upgrades: Ensuring the smoothest upgrade path possible between schema revisions is exactly why Kops was created - upholding forward momentum with barely any impact on operations along the way.
High Availability: Its technical wizardry empowers the construction of fortified, far-reaching cluster systems jam-packed with cutting-edge features.
Configuration Management: Engaging Kops enables the optimization of network settings, DNS configuration, and security controls within the cluster. Declarative specification of clusters is made possible by it.
Scaling: Using Kops to increase or decrease the number of worker nodes in a Kubernetes cluster allows you to adapt to any change in workload demands smoothly.
Backup and Restore: Safeguarding vital information and configuration files, Kops offers backing up and recovery capabilities.
Integration: Integrated with various Kubernetes-connected instruments and modules, including Kubectl and Helm, Kops simplifies operating within Kubernetes environments.
Open Source: Investing resources into something like this ensures continued updates due to regular oversight from multiple parties working together.
Kops setup
Pre-requisite
As we discussed above, Kops is just a tool to automate the cluster creation and we'll use Kops to create Kubernetes cluster on AWS. Before that, we have to set up the Kops follow the following steps to set up the Kops:
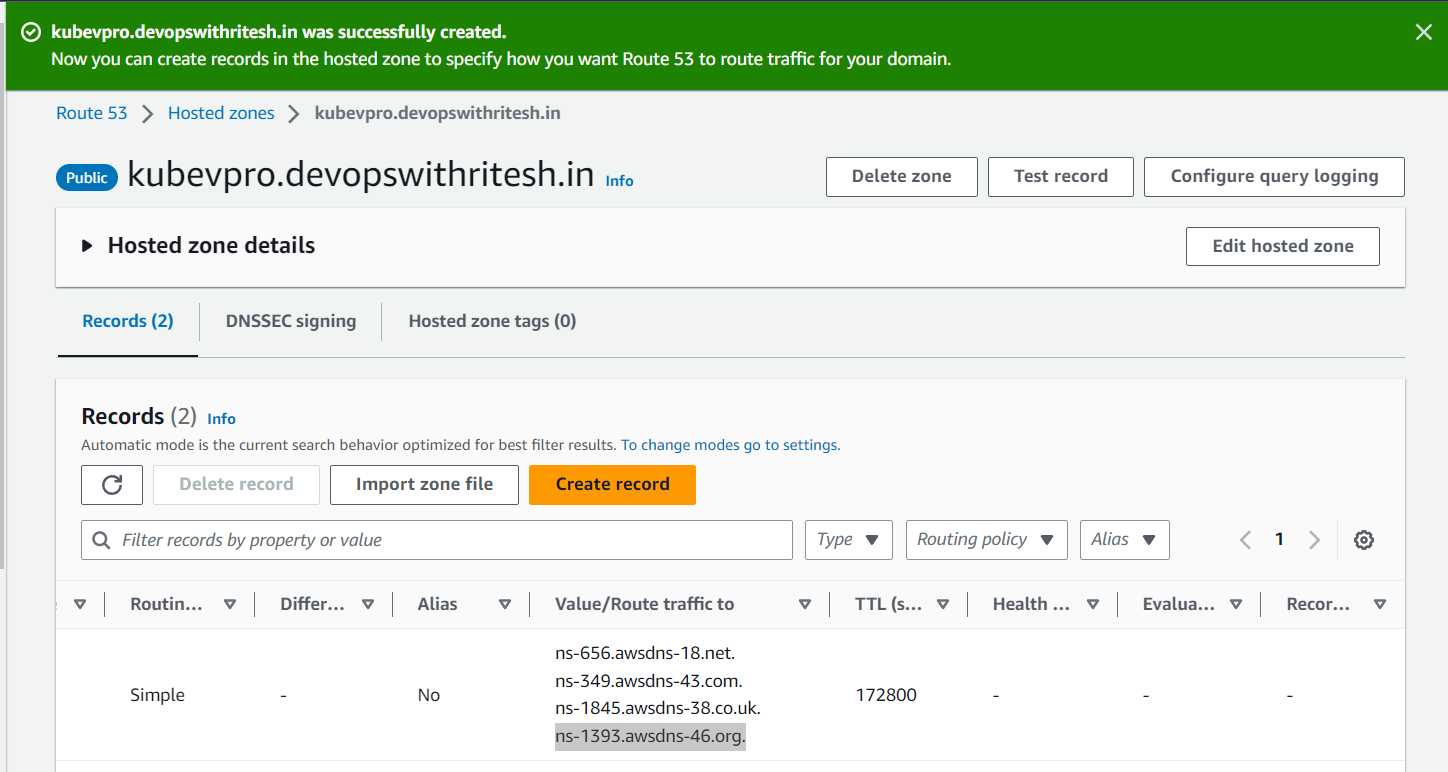
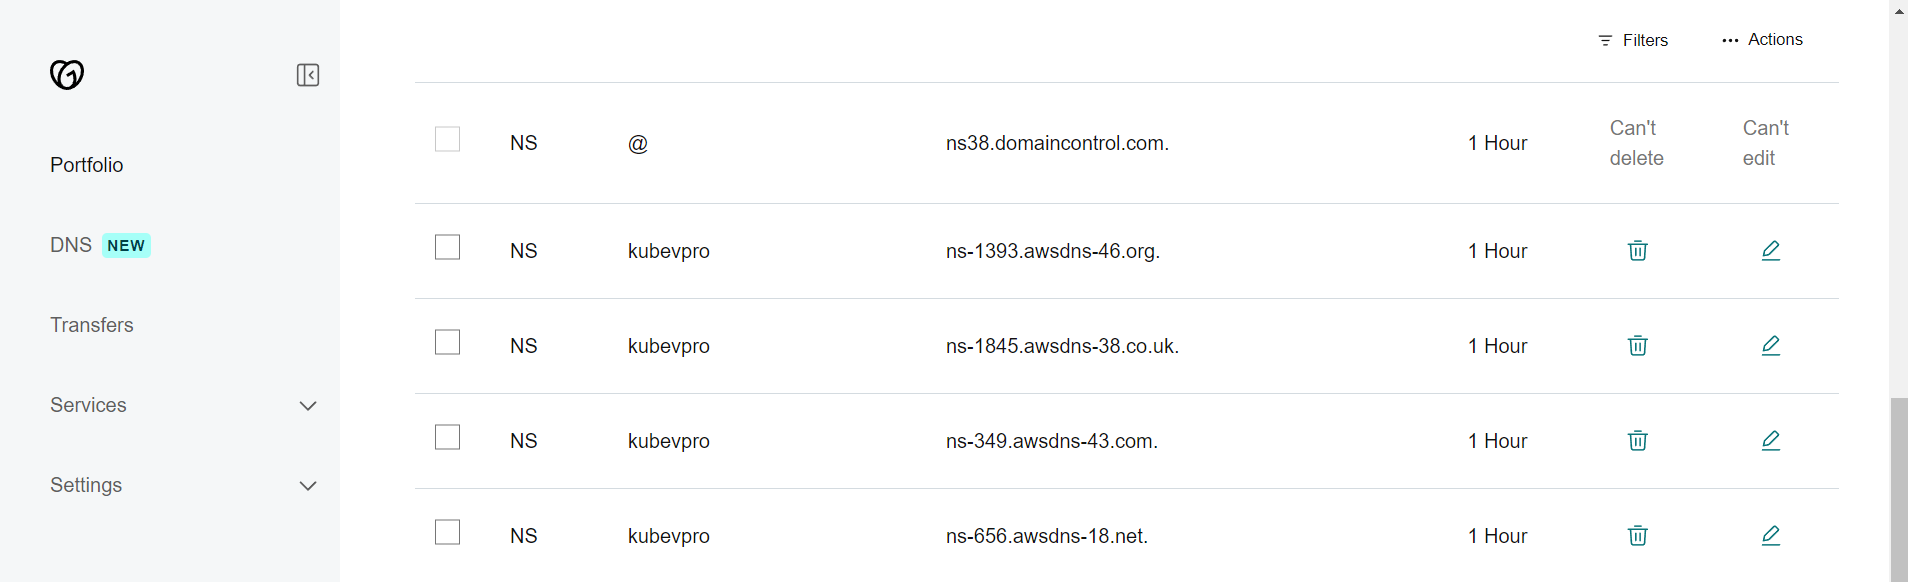
Domain for K8S DNS record: You must have a domain from rout53 or from any domain provider. I have devopswithritesh.in from GoDaddy.
Hosted Zone: Create a hosted zone in route53 and configure it with you DNS records.
IAM Role: Create an IAM role and assign the administrator policy or create an IAM user with an administrator policy that will help the Kops instance to create resources in AWS.
Kops Instance: Lunch an EC2 instance preferably Ubuntu, install Kops in it, and attach the IAM role created above.
Create Secretkey: Create the public and private keys in the Kops instance using
ssh-keygen. The public key will be used by other instances to connect with Kops.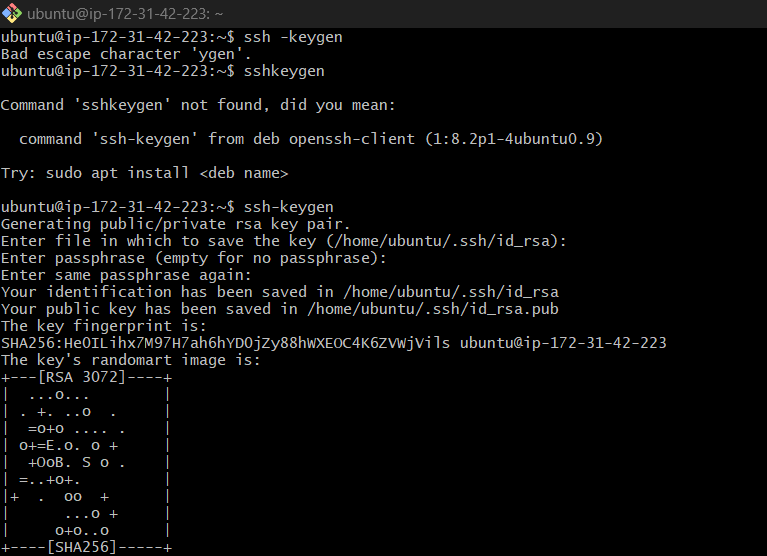
Install AWS CLI: Install AWS CLI inside your EC2 instance so that Kops can use AWS CLI to interact with your AWS account and create resources.
install awscliConfigure AWS CLI: Configure the AWS CLI with the created user if you have created a user instead of a role in the IAM role section.
aws configureInstall Kubectl: Install kubectl from the kubectl installation page, give it executable permission
chmod 777 ./kubectl, and finally, move it to/usr/local/bin/bysudo mv kubectl /usr/local/bin/so that we can access kubectl from anywhere.Create S3 Bucket: Create an S3 bucket in the same region which will store the Kubernetes Configuration created by Kops.
Installation Kops
Here we are using Kops 1.26.4.
Download the Kops by wget https://github.com/kubernetes/kops/releases/download/v1.26.4/kops-linux-amd64
Give it the executable permission chod +x kops-linux-amd64
Move it to /usr/local/bin/kops by sudo mv kops-linux-amd64 /usr/local/bin/kops because it will allow us to run the Kops command from anywhere.
Post Installation Step
After completing all the installation steps we have to check if our nameservers are working fine and are ready to be used with our K8S cluster.
nslookup -type=ns kubevpro.devopswithritesh.in
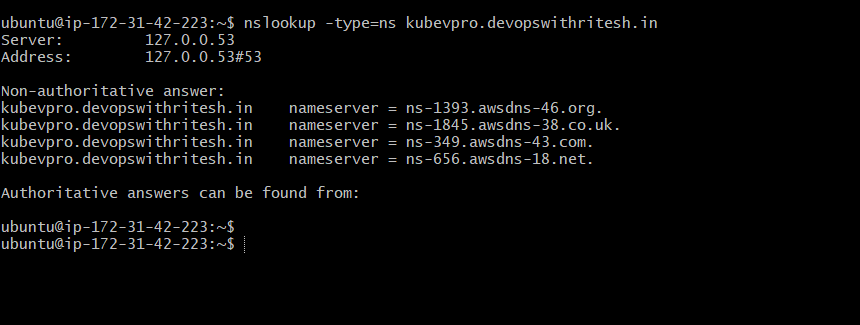
Now it resolves to the 4 name servers I have created.
Cluster Creation
Now, we can create the cluster via Kops using a few Kops commands
 kops create cluster --name=kubevpro.devopswithritesh.in \
> --state=s3://kops-bucket-03092023 \
> --zones=us-east-1a,us-east-1b \
> --node-count=2 \
> --node-size=t3.small \
> --master-size=t3.medium \
> --dns-zone=kubevpro.devopswithritesh.in \
> --node-volume-size=8 \
> --master-volume-size=8
Now let's understand the commands:
kops create cluster: This is the main command for creating a Kubernetes cluster using Kops.--name=kubevpro.devopswithritesh.in: Specifies the name for your Kubernetes cluster. In this case, it's named "kubevpro.devopswithritesh.in."--state=s3://kops-bucket-03092023: Specifies the state storage location for your cluster configuration. Kops stores cluster configuration in an S3 bucket, and this option tells Kops to use the bucket located at "s3://kops-bucket-03092023" to store cluster state information.--zones=us-east-1a,us-east-1b: Specifies the availability zones in which your cluster nodes will be deployed. In this case, the cluster will span across two availability zones: "us-east-1a" and "us-east-1b."--node-count=2: Sets the number of worker nodes in your cluster to 2. You can adjust this number based on your workload requirements.--node-size=t3.small: Defines the EC2 instance type for the worker nodes. In this case, it's set to "t3.small," which is a specific instance type in AWS. You can choose an instance type that suits your workload.--master-size=t3.medium: Specifies the EC2 instance type for the master nodes of your cluster. Master nodes manage the control plane of your Kubernetes cluster.--dns-zone=kubevpro.devopswithritesh.in: Sets the DNS zone for the cluster
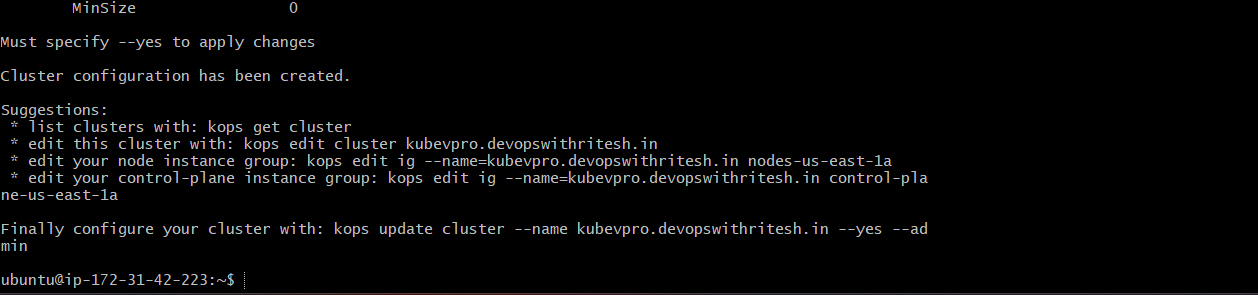
Using the above command we can create the configuration for our cluster:
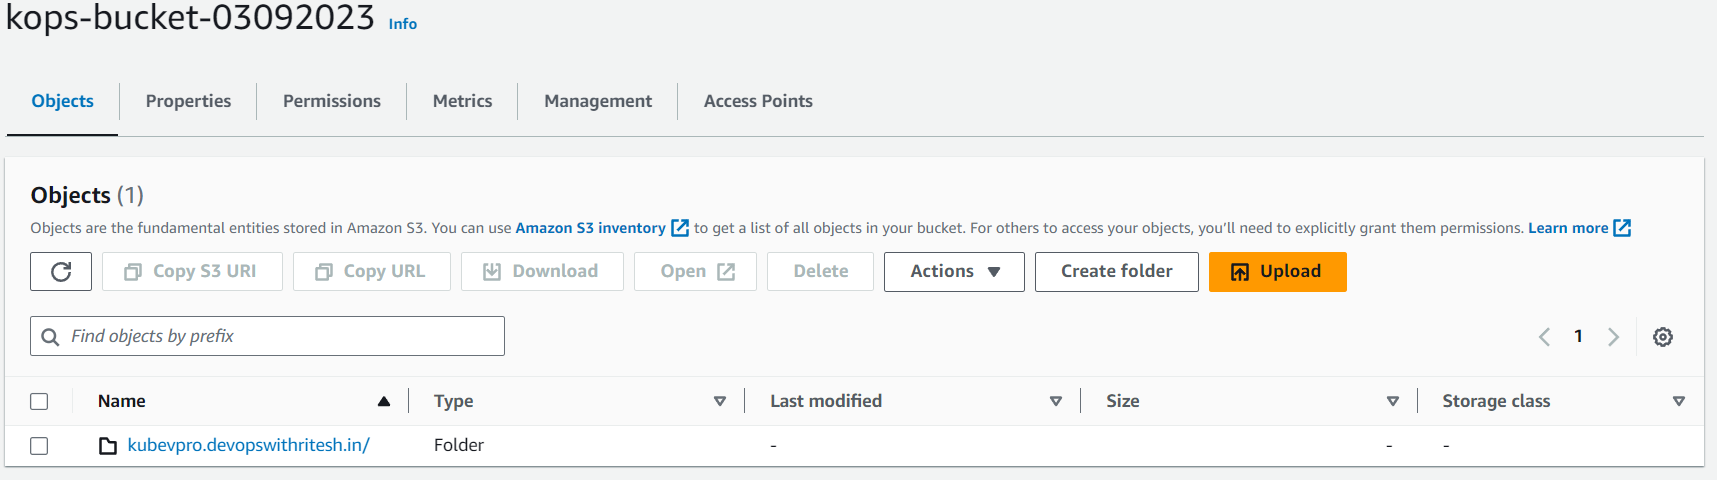
The configuration is now stored in the S3 bucket:
Now, as our configuration is ready we can create the cluster out of the configuration using the below command:
kops update cluster --name kubevpro.devopswithritesh.in --state=s3://kops-bucket-03092023 --yes --admin
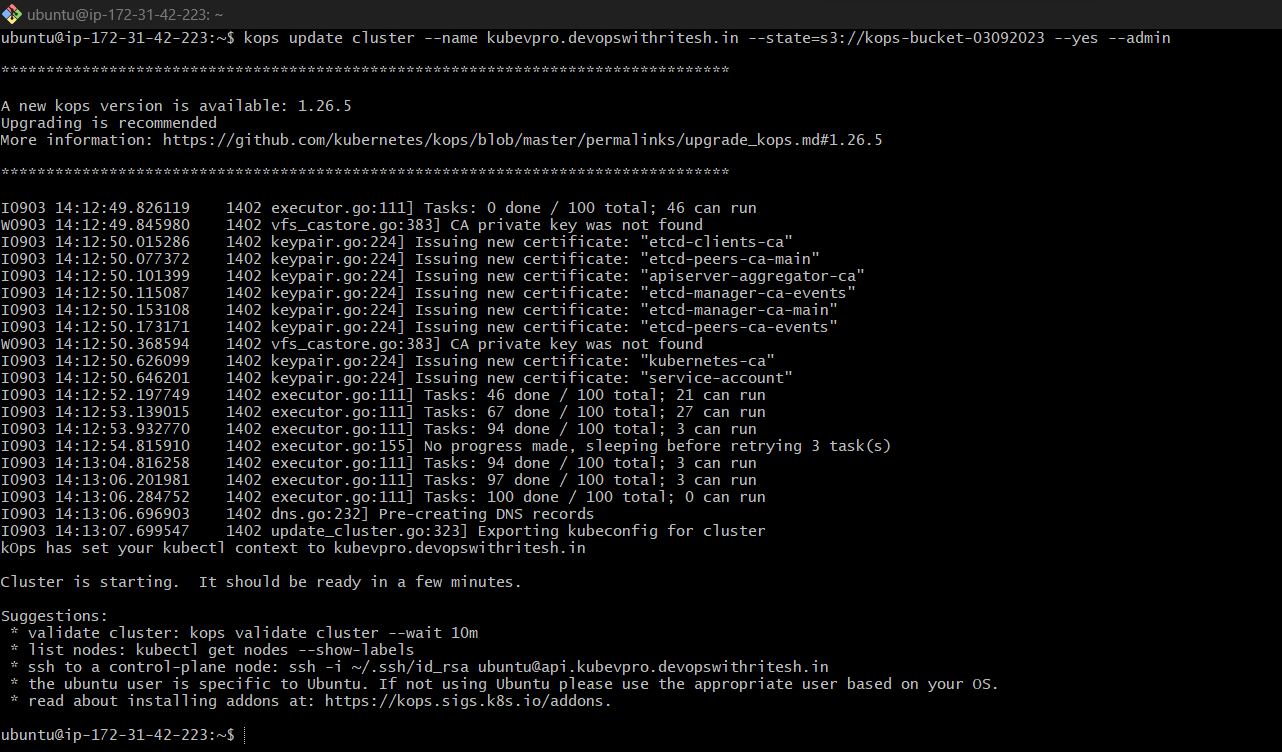
Now the cluster has been created.
Validating the Cluster
Using kops validate cluster --state=s3://kops-bucket-03092023 We can see the cluster details
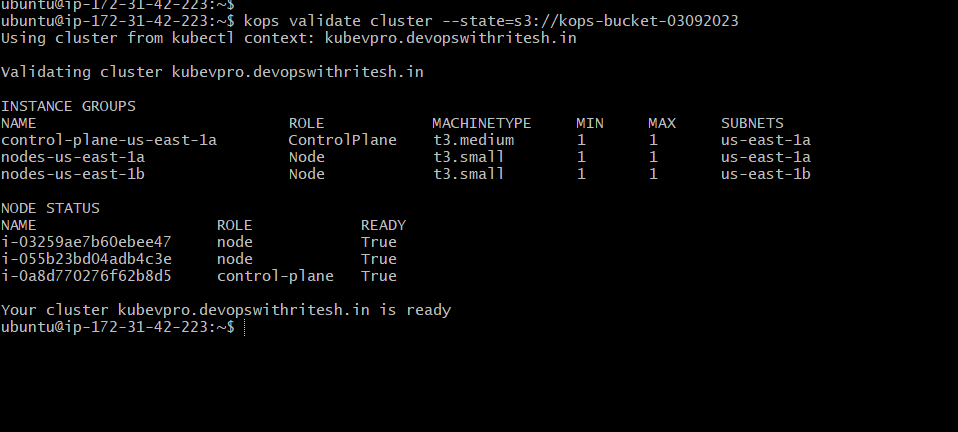
It says our cluster is ready.
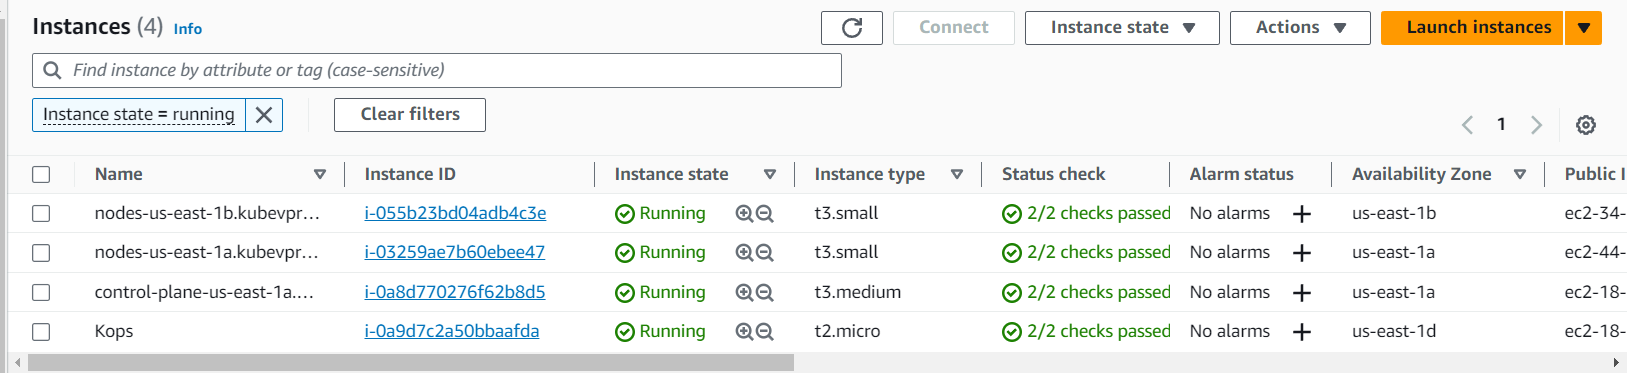
NOTE: Now the above instances excluding Kops-Instance are created by Kops out of which 1 is Master Node or Control-Plane other 2 are worker nodes or Data-Planes.
All these instances are managed by auto-scaling groups which are created and managed by Kops.
These instances are also created in a separate VPC.
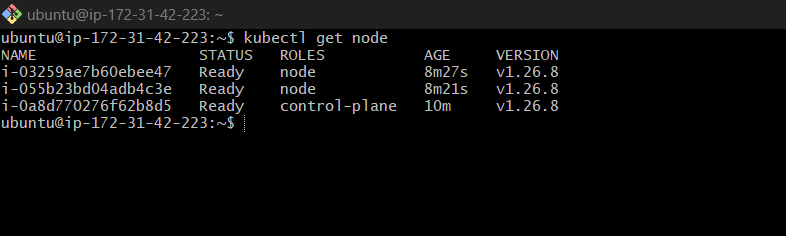
Using kubectl
Now we can also interact with the cluster using kubectl such as kubectl get node shows us the node details:
Deleting Cluster
We can delete the cluster by simple command:
kops delete cluster --name=kubevpro.devopswithritesh.in --state=s3://kops-bucket-03092023 --yes
Now you can see instances are shutting down:

Quick Kops Commands
List clusters with:
kops get clusterEdit this cluster with:
kops edit clusterkubevpro.devopswithritesh.inEdit your node instance group:
kops edit ig --name=kubevpro.devopswithritesh.in nodes-us-east-1aEdit your control-plane instance group:
kops edit ig --name=kubevpro.devopswithritesh.in control-plane