3-tier Application Deployment on K8S Cluster
Deployed a complete 3-tier application to Kubernetes cluster. Cluster created by Kops(Kubernetes Operations) tool. K8S|Kops|AWS|Docker
Passionate about helping organizations build scalable infrastructure and DevOps solutions with cloud technologies. Experienced in designing robust systems, automating processes, and driving efficiency through innovative cloud solutions. Advocate for best practices in DevOps and cloud computing, committed to enabling teams to achieve their full potential.
Project Overview
In this project, we'll orchestrate the Java-based multi-tier application on the Kubernetes Cluster that we have containerized previously. Here we'll create a production-grade Kubernetes Cluster using the Kops(Kubernetes Operations) tool. So, let's get started.
Flow of Execution
Lunch the Kubernetes Cluster using Kops
Containerized application
Create EBS volume to run DB pod for persistence data for MySQL(Stateful application)
Lable nodes with the zone name
Write Kubernetes definition file
Deployment
Service
Secret
Volume
Cluster Creation
 kops create cluster
> --name=kubevpro.devopswithritesh.in \
> --state=s3://kops-bucket-03092023 \
> --zones=us-east-1a,us-east-1b \
> --node-count=2 \
> --node-size=t3.small \
> --master-size=t3.medium \
> --dns-zone=kubevpro.devopswithritesh.in \
> --node-volume-size=8 \
> --master-volume-size=8
kops update cluster --name kubevpro.devopswithritesh.in --state=s3://kops-bucket-03092023 --yes --admin
Volume Prerequisite for DB Pod
Now, before writing the definition files for our pods, we have to create a volume for our DB pod so it can store MySQL data in it.
Creating Command from CLI:
aws ec2 create-volume --availability-zone=us-east-1a --size=3 --volume-type=gp2
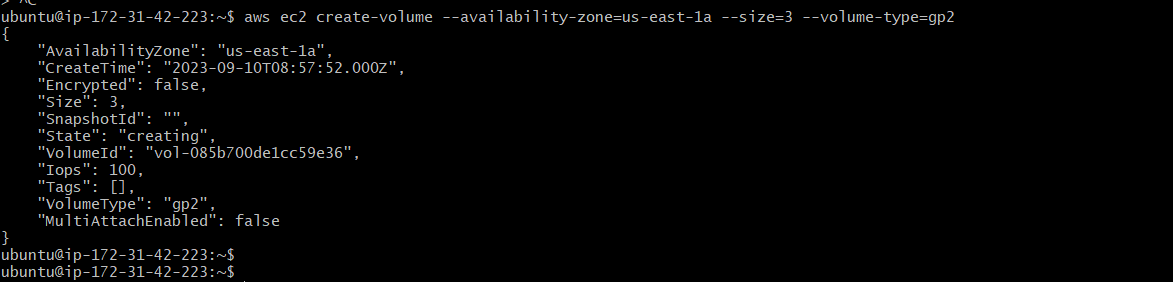
We have created an EBS volume through awscli to store data generated from MySQL.
NB: We have to make sure that when we are creating our DB Pod it should be running on the same availability zone where the EBS volume is created. We can make that through the nodeSelector option in the definition file.
Writing Definition Files
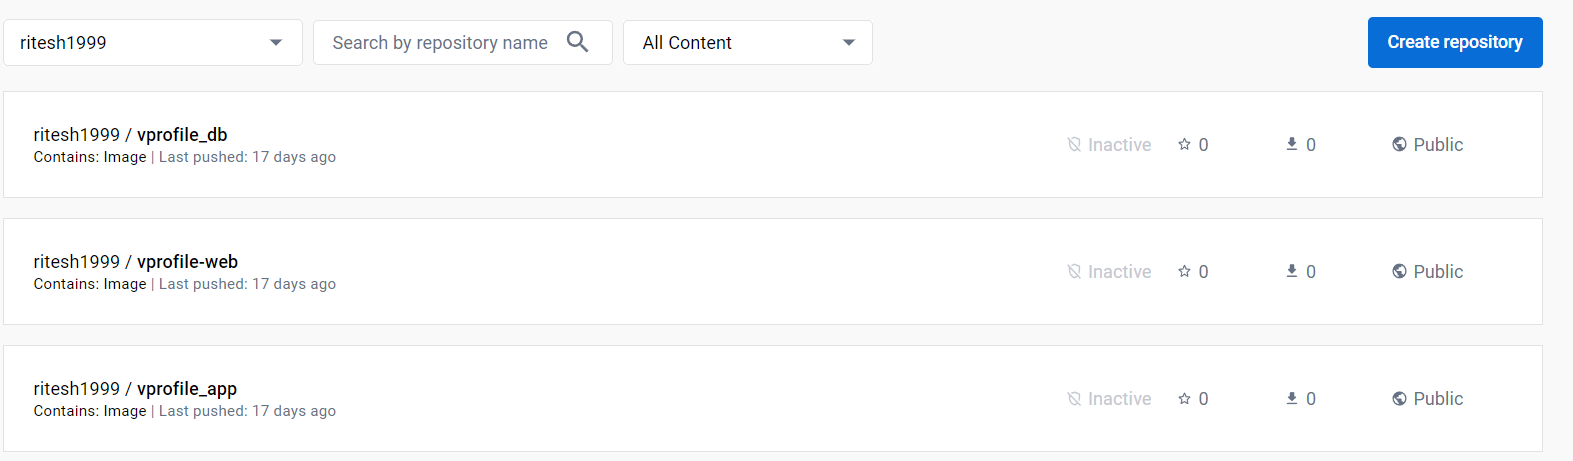
While writing the deployment, service, and other definition files, we'll use the images of MySQL and application images from our DockerHub repository.
NB: We are not going to use Nginx Image which is vprofile-web instead, we are going to spin up a load balancer.
Creating Secret
First of all, we'll create a secret for our Kubernetes pods. A secret is a component of Kubernetes that stores sensitive information used in the Kubernetes clusters such as passwords, secret tokens, etc...
---
apiVersion: v1
kind: Secret
metadata:
  name: app-secret
  labels:
    app: vpro
type: Opaque
data:
  db-pass: dnByb2RicGFzcw==
  rmq-pass: Z3Vlc3Q=
Here, we have stored the passwords for MySQL and RabbitMQ.The passwords are encoded to base64 format by echo -n <password> | base64 .
Creating Deployment file for MySQL
---
apiVersion: apps/v1
kind: Deployment
metadata:
name: vprodb #we are going to create a service of type clusterIP and the service will route the traffic to deployments which has this lable
labels:
app: vprodb
spec:
replicas: 1
selector:
matchLabels:
app: vprodb
template:
metadata:
labels:
app : vprodb
spec:
containers:
- name: vprodb
image: ritesh1999/vprofile_db:latest
volumeMounts:
- mountPath: /var/lib/mysql
name: vpro-db-data #this is the name of the volume
ports:
- name: vprodb-port
containerPort: 3306
env:
- name: MYSQL_ROOT_PASSWORD
valueFrom:
secretKeyRef:
name: app-secret
key: db-pass
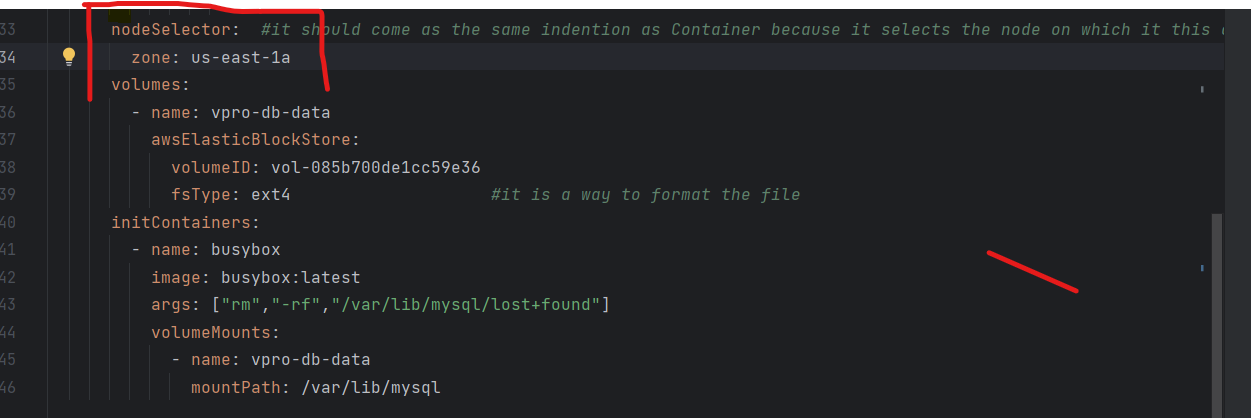
nodeSelector: #it should come as the same indention as Container because it selects the node on which it this container will run
zone: us-east-1a
volumes:
- name: vpro-db-data
awsElasticBlockStore:
volumeID: vol-085c700de1ca59e36
fsType: ext4 #it is a way to format the file
initContainers: #it is just like any other container but it will start before anyother ocntainer and perform the operation supplied to the args
- name: busybox
image: busybox:latest
args: ["rm","-rf","/var/lib/mysql/lost+found"]
volumeMounts:
- name: vpro-db-data
mountPath: /var/lib/mysql #here we are mounting the mysql folder to this container so that it can perform the sommand written in Args
Now that the deployment has been created for MySQL, we'll create a service file for the same so that it can route traffic to it.
Creating Service for MySQL
---
#all the service details will be based on the application properties file
apiVersion: v1
kind: Service
metadata:
  name: vprodb   #this name is from application.properties file
spec:
  ports:
    - port: 3306
      nodePort: 30003
      targetPort: vprodb-port
      protocol: TCP
  selector:
    app: vprodb  #it should be as saame as deployment file
  type: ClusterIP
Creating Deployment for Memcached
apiVersion: apps/v1
kind: Deployment
metadata:
  name: vpromc
  labels:
    app: vpromc
spec:
  selector:
    matchLabels:
      app: vpromc
  replicas: 1
  template:
    metadata:
      labels:
        app: vpromc
    spec:
      containers:
        - name: vpromc
          image: memcached
          ports:
            - name: vpromc-port
              containerPort: 11211
Creating Service for Memcached
apiVersion: v1
kind: Service
metadata:
  name: vprocache01
spec:
  ports:
    - port: 11211
      targetPort: vpromc-port
      protocol: TCP

  selector:
    app: vpromc
  type: ClusterIP
We are exposing the cluster IP for all the services using the type: ClusterIP .
Creating Deployment for RabbitMQ
---
apiVersion: v1
kind: Deployment
metadata:
  name: vpromq01
  label:
    app: vpromq01
spec:
  replicas: 1
  selector:
    matchLabels:
      app: vpromq01

  template:
    metadata:
      label:
        app: vpromq01       # this is the label for our pod
      spec:
        containers:
          - name: vpromq01
            image: rabbitmq       # this is also the official image from dockerhub
            ports:
              - name: vpromq01-port
                containerPort: 15672

            env:
              - name: RABBITMQ_DEFAULT_PASS
                valueFrom:
                  secretKeyRef:
                    name: app-secret
                    key: rmq-pass
              - name: RABBITMQ_DEFAULT_USER
                value: "guest"
Here we have involved env which allows us to pass environment variables and we are passing the username and password for RabbitMQ using env attribute. We have imported the password from the secret named app-secret using the attribute valueFrom and secretKeyRef under it.
Creating Service for RabbitMQ
apiVersion: v1
kind: Service
metadata:
  name: vprormq01
spec:
  selector:
    app: vprormq01
  ports:
    - port: 15672
      targetPort: vpromq01-port
      protocol: TCP
  type: ClusterIP #exposing the cluster IP
Creating Tomcat Deployment
apiVersion: apps/v1
kind: Deployment
metadata:
  name: vproapp
  labels:
    app: vproapp
spec:
  replicas: 1
  selector:
    matchLabels: vproapp
  template:
    metadata:
      labels:
        app: vproapp
    spec:
      containers:
        - name: vproapp
          image: ritesh1999/vprofile_app:latest
          ports:
            - name: vproapp-port
              containerPort: 8080

      # here we want our MySQL db to be up before the this tomcat starts. So, we are putting my db in initcontainer
      #until the mydb is not up and running this tomcat will not start
      initContainers:
        - name: init-mydb
          image: busybox
          command: ['sh', '-c', 'until nslookup vprodb; do echo waiting for mydb; sleep 2; done;']

        - name: init-memcache
          image: busybox
          command: ['sh', '-c', 'until nslookup vprocache01; do echo waiting for memcached; sleep 2; done;']
Here we have used initContainers an attribute to add 2 dependencies. The containers listed under InitContainers are run before any other container. Here tomcat needs to start only after the Memcached and MySQL services are up and running otherwise it can't function properly.
Hence, we have added certain commands that will ensure DB and Memcaches are up and running before Tomca/App server.
Creating Tomcat Service
apiVersion: v1
kind: Service
metadata:
  name: vproapp-svc
spec:
  ports:
    - port: 80
      targetPort: vproapp-port
      protocol: TCP
  selector:
    app: vproapp
  type: LoadBalancer  #it's going to lunch a Elastic LoadBalancer
Here you can notice the service type is LoadBalancer( type: LoadBalancer ). Because the app server or Tomcat has to be accessible to outside so that people can use it. Elastic Load Balancers will allow users to access the application.
Final Provision
Now all our services and deployments are ready to be applied.
kubectl apply -f . : using this command we can apply everything at once.
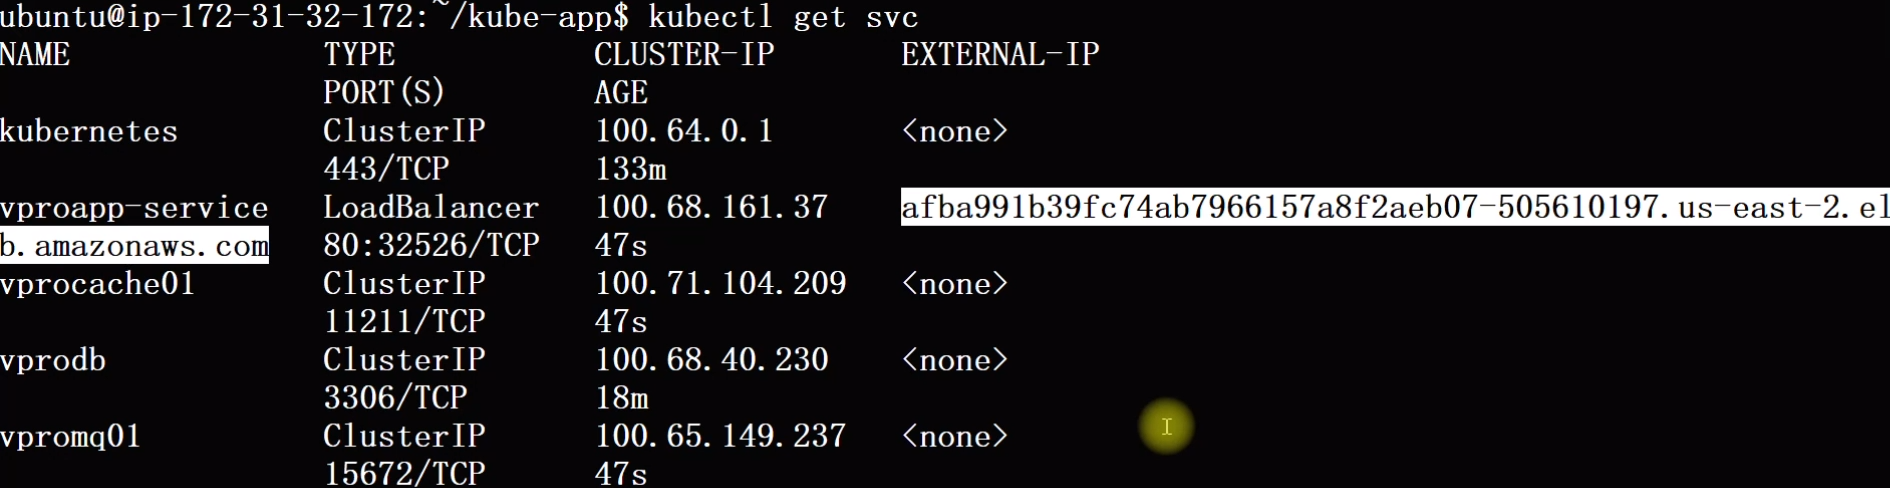
Now after applying, we can see using kubectl get svc the load balancer has been created using which we can access the application directly from the browser.
Clean up
We can clean everything just by kubectl delete -f .
kops delete cluster --name=vprokube.devopswithritesh.in --state=s3://bucketname --yes