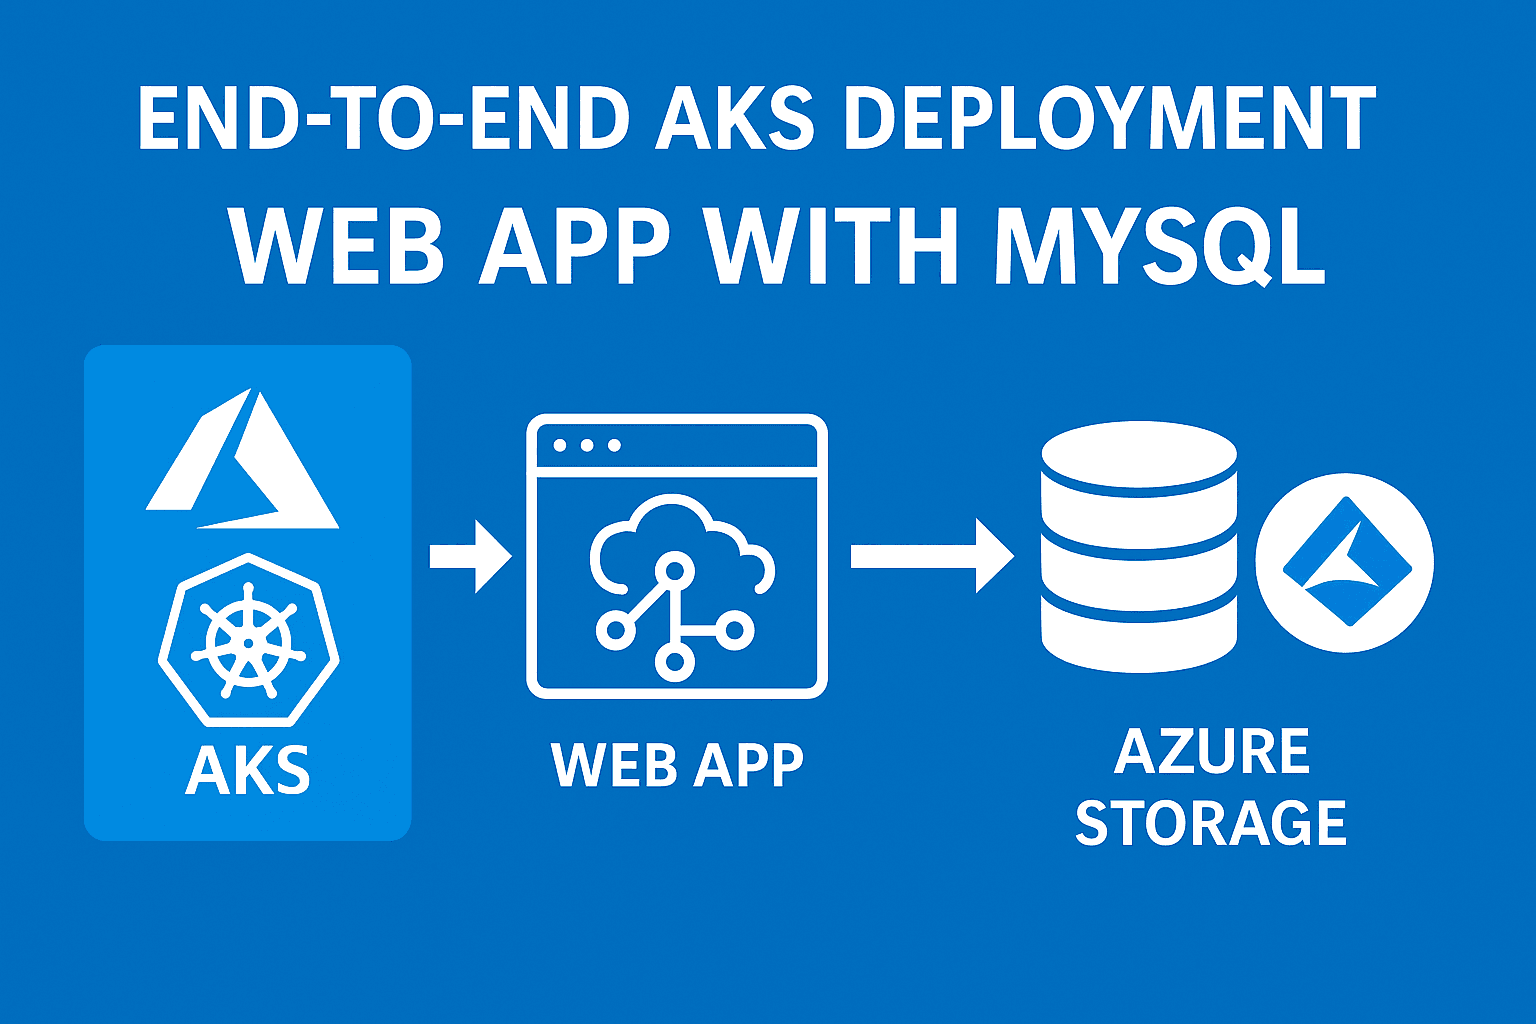
In this article, we’ll be focusing on utilizing Azure Disks for Kubernetes and deploying Stateful applications in an AKS cluster, along with services and their utilization.
Introduction
When it comes to deploying stateful applications like databases in Kubernetes, the primary focus shifts to data persistence and ensuring consistency as pods scale up or down. This is where Persistent Volumes (PVs) come into play allowing data to persist beyond the ephemeral lifecycle of pods.
In Azure Kubernetes Service (AKS), this persistence is powered by Azure Disks, a managed storage solution that offers high durability, reliability, and availability with an SLA of over 99%. Azure Disks simplify storage management while ensuring that your critical application data remains safe and accessible.
In this article, we’ll explore how AKS leverages persistent volumes by deploying a MySQL database along with a web application. We’ll also dive into how internal and user-facing networking components work together to make the application fully functional within a Kubernetes environment.
Storage Class in AKS
In Kubernetes, a Storage Class defines how persistent storage, such as disks or volume is provisioned dynamically for your pods. It works as a blueprint for storage that tells Kubernetes what type of storage to create when the app asks for it. A StorageClass automates the creation of PersistentVolumes (PVs) so you don’t need to manually create PVs each time an app needs storage.
When your app says:
“I need some space to save my data!”
Kubernetes looks at the StorageClass to decide:
What kind of disk to use (fast or cheap),
where to create it (Azure, AWS, etc.), and
How to manage it (Whether delete it post usage or retain it post the pod is deleted or storage is not in use).
So, think of it as a "blueprint" for storage that tells Kubernetes what type of storage to create and how when a PersistentVolumeClaim (PVC) requests it.

When we create AKS cluster, Azure automatically provisions a few default storage classes as shown below

default (default) → Uses Azure Managed Disk (Standard or Premium)
managed, managed-premium → Azure Disk with different tiers
azurefile, azurefile-premium → Azure File shares for persistent network storage
These are predefined by AKS to save you the effort of creating them manually.
So, you can start provisioning volumes immediately without writing a StorageClass manifest.
Custom Storage Class
We only write a custom StorageClass when we need something different from the defaults.
For example:
You want a different disk type (StandardSSD_LRS instead of Premium_LRS)
You need a specific reclaim policy (e.g., Retain instead of Delete)
You need custom parameters like encryption type, zone, or SKU
You want to control binding behavior (Immediate vs WaitForFirstConsumer)
You’re working in multi-cloud or hybrid setups where the default provisioner doesn’t apply
Storage Class vs Persistent Volume vs Persistent Volume Claim
1. StorageClass: The Blueprint
Think of it as a recipe or menu option for how storage should be created.
It defines what kind of storage (SSD/HDD), where (Azure Disk, Azure File), and rules (delete or keep after use).
Example:
"Whenever someone asks for storage, give them a 10 GB Premium SSD disk from Azure."
2. PersistentVolume (PV): The Actual Disk
This is the real storage resource created in your cluster — a piece of Azure Disk or File share.
You can create it manually or Kubernetes can make it automatically using the StorageClass.
Example:
"Here’s a 10 GB Premium SSD disk created in Azure — ready to use!"
3. PersistentVolumeClaim (PVC): The Request
This is what your app (Pod) creates when it needs storage.
It says:
"I need 10 GB of storage from a Premium disk!"
Kubernetes then looks for a matching PV or uses the StorageClass to create one automatically.
PVC  →  asks for storage
        ↓
StorageClass  →  tells Kubernetes what kind of storage to create
        ↓
PV  →  actual storage created (disk or file share)
Understanding Storage Class Attributes
There are five important attributes when it comes to storage class that are necessary to understand while creating a custom storage class.
NAME
This is the name of the StorageClass. We use this name in PersistentVolumeClaim (PVC) to tell Kubernetes which kind of storage you want.
PROVISIONER
It defines which system or plugin is responsible for creating the storage. In our case, it will be Azure(disk.csi.azure.com and file.csi.azure.com).
RECLAIMPOLICY
This tells Kubernetes what to do with the volume after the PVC is deleted (i.e., when your app no longer needs it).
| Policy | Meaning |
| --- | --- |
| Delete (Default in AKS) | Deletes the underlying disk or file share automatically. |
| Retain | Keeps the disk even after PVC is deleted (you can reuse or inspect it). |
VOLUMEBINDINGMODE
This controls when and where the volume is created and bound. In AKS, we mostly use WaitForFirstConsumer
| Mode | Meaning |
| --- | --- |
| Immediate | Volume is created as soon as the PVC is created, regardless of where the Pod runs. |
| WaitForFirstConsumer | Volume is created only when a Pod is scheduled — ensures the disk is created in the same zone/node where the Pod will run (avoids mismatch issues). |
ALLOWVOLUMEEXPANSION
This indicates whether you can increase the size of the volume later by simply editing the PVC.
| Setting | Meaning |
| --- | --- |
| true (Default in AKS) | You can increase storage size (resize volume). |
| false | Size is fixed — cannot be expanded. |
Writing Storage Class Manifest for Custom Storage Class
---
apiVersion: storage.k8s.io/v1
kind: StorageClass
metadata:
name: managed-premium-retain-sc
provisioner: kubernetes.io/azure-disk
reclaimPolicy: Retain
volumeBindingMode: WaitForFirstConsumer
allowVolumeExpansion: true
parameters:
skuname: Premium_LRS
kind: managed
Post applying the above Storage Class manifest, you can see the custom Storage Class has been created

Understanding PVC(Persistent Volume Claim)
A Persistent Volume Claim (PVC) is essentially a request for storage made by your application pod. As the name suggests, it acts as a “claim” to Kubernetes for a specific amount and type of storage rather than creating or managing the storage directly.
Once this claim is raised, Kubernetes checks the associated Storage Class to understand how the storage should be provisioned. It then creates a Persistent Volume (PV) that fulfills the claim and binds it to the PVC, allowing the pod to mount and use the storage as needed.
Application Pod → Persistent Volume Claim (PVC) → Persistent Volume (PV) → Storage Class → Cloud Storage (Azure Disk)

Access Modes in PVC
Access Modes define how a pod can access (read and write) data on a Persistent Volume (PV). It is like permissions regarding whether one Pod or multiple Pods can use it, and how. There are three access modes as follows
ReadWriteOnce - RWO
Only one Pod can mount the volume for read & write at a time (on one node).
Appropriate for databases like MySQL, MongoDB, and PostgreSQL.
Azure Disk is suitable for ReadWriteOnce since each disk can be mounted by one node at a time.
ReadOnlyMany - ROX
Volume can be read by many Pods, but no one can write.
Appropriate for Shared configs, static data, and logs.
ReadWriteMany - RWX
Volume can be read and written by many Pods at once (even across nodes).
Appropriate for shared file storage, web apps needing shared uploads.
Azure File is suitable for ReadWriteMany since a File share can be mounted by multiple Pods/nodes. So, if you need multiple Pods to access the same data, use Azure File, not Azure Disk.
Summary
| Scenario | Recommended Mode |
| Single database Pod that writes data | ReadWriteOnce |
| Multiple Pods reading shared data | ReadOnlyMany |
| Multiple Pods needing shared read-write storage (like WordPress media uploads) | ReadWriteMany |

Writing PVC(Persistent Volume Claim) Manifest
---
apiVersion: v1
kind: PersistentVolumeClaim
metadata:
name: azure-managed-disks-pvc
spec:
accessModes:
- ReadWriteOnce
storageClassName: managed-premium-retain-sc
resources:
requests:
storage: 5Gi
After applying the above PVC, the PVC has been created as shown below; however, it is in the pending state because in the storage class manifest, volumeBindingMode is set to waitForFirstConsumer . In this mode, the actual volume provisioning is delayed until a pod that uses this PVC is scheduled, ensuring that the storage is created in the same zone as the consuming pod.

If the volumeBindingMode had it been set to Immediate, the requested 5 GB of storage would have been provisioned right away, regardless of whether any pod was scheduled or not.
Understanding ConfigMap and its Usecase
ConfgMap is a Kubernetes object that lets you store non-secret configuration data like environment variables, config files, or scripts separately from your application code. In short, it allows you to externalize your non-secretive data so your containers remain clean and reusable.
In the context of deploying a stateful application, i.e., MySQL, in our project, we are going to use a ConfigMap to store the .sql script inside a ConfigMap that will be used for creating a basic schema when MySQL is deployed in a pod.
Writing ConfigMap Manifest
---
apiVersion: v1
kind: ConfigMap
metadata:
  name: usermanagement-dbcreation-script
data:
  mysql_usermgmt_db_init_script.sql: |
    DROP DATABASE IF EXISTS webappdb;
    CREATE DATABASE webappdb;
This ConfigMap stores a SQL initialization script that will be used by your MySQL Pod to create the database webappdb.
It first drops any existing database with that name (to start clean) and then creates it again.
Usage of ConfigMap
ConfigMaps can be used in two main ways
As an Environment Variable
Inject the data directly into the container environment.
 envFrom:
   - configMapRef:
       name: usermanagement-dbcreation-script
As Mounted Volume
Mount the ConfigMap as a file or directory inside the container.
volumeMounts:
  - name: config-volume
    mountPath: /docker-entrypoint-initdb.d
volumes:
  - name: config-volume
    configMap:
      name: usermanagement-dbcreation-script
Overall Execution Flow
You created a PVC → requests storage for MySQL data.
You create a ConfigMap → holds your SQL schema file.
You’ll create a MySQL Deployment →
When the Pod starts, MySQL runs the .sql file and creates your database automatically

Understanding MySQL Deployment
Deployment is a top-level Kubernetes controller that manages Pods and instructs Kubernetes on what to run, the number of replicas, and how to maintain their health.
A Deployment ensures your app (Pod) is always running the desired number of instances, with the correct configuration.
Deployment in the context of MySQL(a Stateful application)
For a MySQL database, the Deployment does these things:
Runs a MySQL container
Mounts storage (PVC) to persist data
Mounts ConfigMap (your .sql file) to initialize schema
Defines environment variables like MYSQL_ROOT_PASSWORD, MYSQL_DATABASE
Ensures MySQL restarts automatically if the Pod crashes
Writing Deployment Manifest for MySQL
When this Deployment runs, Kubernetes will:
Create a Pod with MySQL 5.6
Mount your Azure-managed disk (PVC)
Run the .sql script from the ConfigMap to create webappdb
Keep the Pod alive and recreate it if it crashes, while preserving data
---
apiVersion: apps/v1
kind: Deployment
metadata:
name: mysql-deployment
spec:
replicas: 1
selector:
matchLabels:
app: mysql
strategy:
type: Recreate
template:
metadata:
labels:
app: mysql
spec:
containers:
- name: mysql-container
image: mysql:5.6
env:
- name: MYSQL_ROOT_PASSWORD
value: dbpass123!
ports:
- containerPort: 3306
name: mysql
volumeMounts:
- name: mysql-persistent-storage
mountPath: /var/lib/mysql
subPath: mysql-data
- name: usermanagement-dbcreation-script
mountPath: /docker-entrypoint-initdb.d
volumes:
- name: mysql-persistent-storage
persistentVolumeClaim:
claimName: azure-managed-disks-pvc
- name: usermanagement-dbcreation-script
configMap:
name: usermanagement-dbcreation-script
The diagram below depicts a holistic view of how everything is put together in the Deployment:

Understanding the Role of ClusterIP & Headless Service
A Service in Kubernetes is a resource that is responsible for exposing pods to the network, both internally and externally.
Exposing a pod’s network internally means allowing the pod to communicate inside the Cluster with other resources, whereas exposing externally means allowing the pod to be accessible to the public internet.
Since pods are ephemeral (can restart, move, or change IP) service provides a stable endpoint(DNS name or IP) for accessing them.
Think of it as a constant address that points to your Pod, even if the Pod itself keeps changing. !
A ClusterIP is the default Service type in Kubernetes. It exposes your application inside the cluster using a stable internal IP address. Whenever Pods are recreated (and their IPs change), the ClusterIP remains the same, allowing other Pods or services to connect to it reliably.
If your web application runs multiple Pods, a ClusterIP service ensures load-balanced internal access; any backend Pod can talk to it consistently, even if Pods restart or change IPs.
Headless Service & Its Importance for Stateful Application(MySQL)
A Headless Service is a special type of Service that does not have its own Cluster IP. Which means Kubernetes does not assign a virtual IP to the service; instead, DNS resolves directly to the Pod’s IP. So the application (like your web app) connects directly to the Pod, not through a proxy or virtual IP.
Headless service is required for MySQL because:
We have only one MySQL Pod.
We want your web application to connect directly to that Pod’s IP.
It ensures lower latency and avoids load-balancing overhead (unnecessary for a single database instance).
Even if you had multiple database replicas (like in a StatefulSet), a headless service would also help clients resolve to individual Pod IPs (e.g., mysql-0, mysql-1).
Writing Service Manifest for MySQL
---
apiVersion: v1
kind: Service
metadata:
name: mysql-svc
spec:
selector:
app: mysql
ports:
- port: 3306
clusterIP: None
This manifest creates a Headless Service named mysql-svc for your MySQL Pod.
Instead of assigning a virtual ClusterIP, it allows other Pods (like your web application) to connect directly to the Pod’s IP.
Summary
| Term | Meaning |
| ClusterIP Service | Has a stable virtual IP (used for load-balanced access) |
Headless Service (clusterIP: None) | No virtual IP — connects directly to Pod(s) |
| Why Headless for MySQL? | Because there’s only one Pod, and we want direct, stable access to its IP |
Output


This confirms that the StorageClass → PVC → PV → Pod chain is working flawlessly.
| Component | Status | Description |
| StorageClass | ✅ Created | Defines disk type and policy (Retain) |
| PVC | ✅ Bound | Requested and got a 5Gi Azure Disk |
| PV | ✅ Bound | Actual 5Gi disk created in Azure |
| Deployment (Pod) | ✅ Running | MySQL Pod running and attached to PVC |
| Service | ✅ Active | Headless service exposes MySQL directly via Pod IP |
Database Setup Conclusion
With all the manifests applied, our MySQL database is now fully deployed and functional inside AKS. The StorageClass dynamically provisioned an Azure-managed disk, which our PersistentVolumeClaim (PVC) successfully bound to ensure data persistence. The ConfigMap initialized the database automatically with our predefined schema, while the Deployment maintained the MySQL Pod lifecycle with persistent storage attached. We then exposed the Pod using a Headless Service, allowing other Pods (like our web application) to connect directly using the Pod IP instead of a ClusterIP. Finally, by accessing the MySQL Pod through a client, we confirmed that the webappdb schema was created successfully, validating that our entire configuration chain, from storage provisioning to application-level database initialization, works seamlessly within the AKS environment.
Deploying WebApp
Deploy a User Management Web App that connects to your existing MySQL database (webappdb).
This app will act as the frontend interface and provide APIs for:
Creating users
Listing users
Deleting users
Key Kubernetes Concepts
| Kubernetes Concept | Purpose |
| Deployment | Runs the User Management Web App Pod(s) |
| Environment Variables | Provides database connection details (DB host, DB name, DB user, password) |
| Init Containers | Optional — can be used to verify MySQL readiness before app starts |
| Service (LoadBalancer) | Exposes the web app externally via an Azure Load Balancer |
Understanding the Deployment Manifest for WebApp
This Deployment creates and manages the User Management Web Application, which serves as the frontend for interacting with the MySQL database hosted within the AKS cluster. It exposes APIs to perform operations such as creating, listing, and deleting users from the webappdb schema in MySQL.
WebApp (LoadBalancer Service) → WebApp Pod → MySQL (Headless Service) → Azure Disk (Persistent Storage)

At a high level, this Deployment performs three main functions: database readiness check, application startup, and environment configuration.
---
apiVersion: apps/v1
kind: Deployment
metadata:
name: usermgmt-webpp-deployment
labels:
app: usermgmt-webapp
spec:
replicas: 1
selector:
matchLabels:
app: usermgmt-webapp
template:
metadata:
labels:
app: usermgmt-webapp
spec:
initContainers:
- name: init-db
image: busybox:1.31
command: ['sh', '-c', 'echo -e "Checking for the availability of MySQL Server deployment"; while ! nc -z mysql 3306; do sleep 1; printf "-"; done; echo -e " >> MySQL DB Server has started";']
containers:
- name: usermgmt-webapp-container
image: stacksimplify/kube-usermgmt-webapp:1.0.0-MySQLDB
imagePullPolicy: Always
ports:
- containerPort: 8080
env:
- name: DB_HOSTNAME
value: "mysql"
- name: DB_PORT
value: "3306"
- name: DB_NAME
value: "webappdb"
- name: DB_USERNAME
value: "root"
- name: DB_PASSWORD
value: dbpass123!
Understanding Init Container
Before the main web application container starts, an Init Container named init-db runs a simple shell command that continuously checks if the MySQL service is reachable on port 3306.
It uses a lightweight BusyBox image with the nc (netcat) utility to poll the MySQL service.
This ensures that:
Below is the extracted init container part from the main manifest written above:
initContainers:
- name: init-db
image: busybox:1.31
command: ['sh', '-c', 'echo -e "Checking for the availability of MySQL Server deployment"; while ! nc -z mysql 3306; do sleep 1; printf "-"; done; echo -e " >> MySQL DB Server has started";']
Understanding Environment Variables
The environment variables section passes database connection details directly into the container:
| Variable | Description |
| DB_HOSTNAME | Hostname of the MySQL service (should match the Service name) |
| DB_PORT | Database port (3306) |
| DB_NAME | Schema name (webappdb) |
| DB_USERNAME | Database username (root) |
| DB_PASSWORD | Database password |
Loadbalancer Service for WebApp
This Kubernetes Service exposes the User Management Web Application externally so users can access it through a public IP assigned by Azure. Since the application serves as a frontend/API layer, it needs to be reachable from outside of the cluster, and for that, AKS provides the LoadBalancer Service type.
At a high level, this Service performs two core functions:
(1) Exposes the web application to the internet, and
(2) Routes traffic to the correct Pod inside the cluster.

Writing the LoadBalancer Service Manifest
---
apiVersion: v1
kind: Service
metadata:
name: usermgmt-LB-service
labels:
app: usermgmt-webapp
spec:
type: LoadBalancer
selector:
app: usermgmt-webapp
ports:
- port: 80
targetPort: 8080
Output
Once all manifests were applied, both the MySQL Pod and the User Management WebApp Pod were successfully created and transitioned into the Running state. The LoadBalancer Service also provisioned an external public IP, allowing us to access the application directly from the browser.
Below is the command-line output showing:
The MySQL Pod is up and running
The WebApp Pod is in Running/Ready state
The LoadBalancer Service with an external IP assigned
This confirms that all Kubernetes components have been deployed correctly and the application is fully functional.

Following that is the screenshot of the User Management Web Application, accessible using the LoadBalancer’s external IP. The UI loading successfully in the browser validates that the frontend is reachable and actively communicating with the backend MySQL database.


Conclusion & Architecture
In this section, we successfully deployed a complete User Management Web Application on Azure Kubernetes Service (AKS) backed by a fully functional MySQL database. Through a combination of Kubernetes core concepts, including StorageClass, PersistentVolumeClaim, ConfigMap, Deployment, and Services, we built a production-ready setup capable of running a stateful backend and a stateless frontend together.
The MySQL Pod is provisioned with durable Azure Disk storage, initialized automatically using a ConfigMap-based schema, and exposed internally through a Headless Service for direct Pod-to-Pod communication. The WebApp Pod uses an init container to ensure the database is available before startup, and is exposed externally using an Azure LoadBalancer, enabling seamless user access from outside the cluster.
The command-line outputs confirm the successful creation of all Pods and Services, while the working web interface accessed through the LoadBalancer’s external IP validates both the deployment and the backend integration.
                         ┌────────────────────────┐
                         │   Azure Load Balancer  │
                         │  (Public External IP)  │
                         └─────────────┬──────────┘
                                       │
                                       │
                           Exposes WebApp on Port 80
                                       │
                                       ▼
                          ┌──────────────────────────┐
                          │     WebApp Deployment     │
                          │   (UserMgmt WebApp Pod)   │
                          │  Container Port : 8080    │
                          └───────┬─────────┬────────┘
                                  │         │
                                  │         │
                                  │     Reads DB Config
                                  │         │
                                  ▼         ▼
                       ┌──────────────────────────┐
                       │        ConfigMap          │
                       │  (DB env variables etc.)  │
                       └───────────────────────────┘
                                  │
                                  │ Headless Service (clusterIP=None)
                                  ▼
                         ┌────────────────────────┐
                         │      MySQL Pod         │
                         │  Port : 3306           │
                         │  Schema : webappdb     │
                         └───────────┬────────────┘
                                     │
                                     │ PVC Bind
                                     ▼
                         ┌────────────────────────┐
                         │ Persistent Volume (PV) │
                         │ Azure Managed Disk     │
                         └────────────────────────┘